Every now and then, you might like to email the people who have registered on your site to give them news, or ask them to engage in some way—by filling out a survey for example.
- You get a lot of “bounce-back” emails from email addresses that don't work
- You might get spam complaints from some people
- You can't really tell who received the email
- The email looks a bit boring
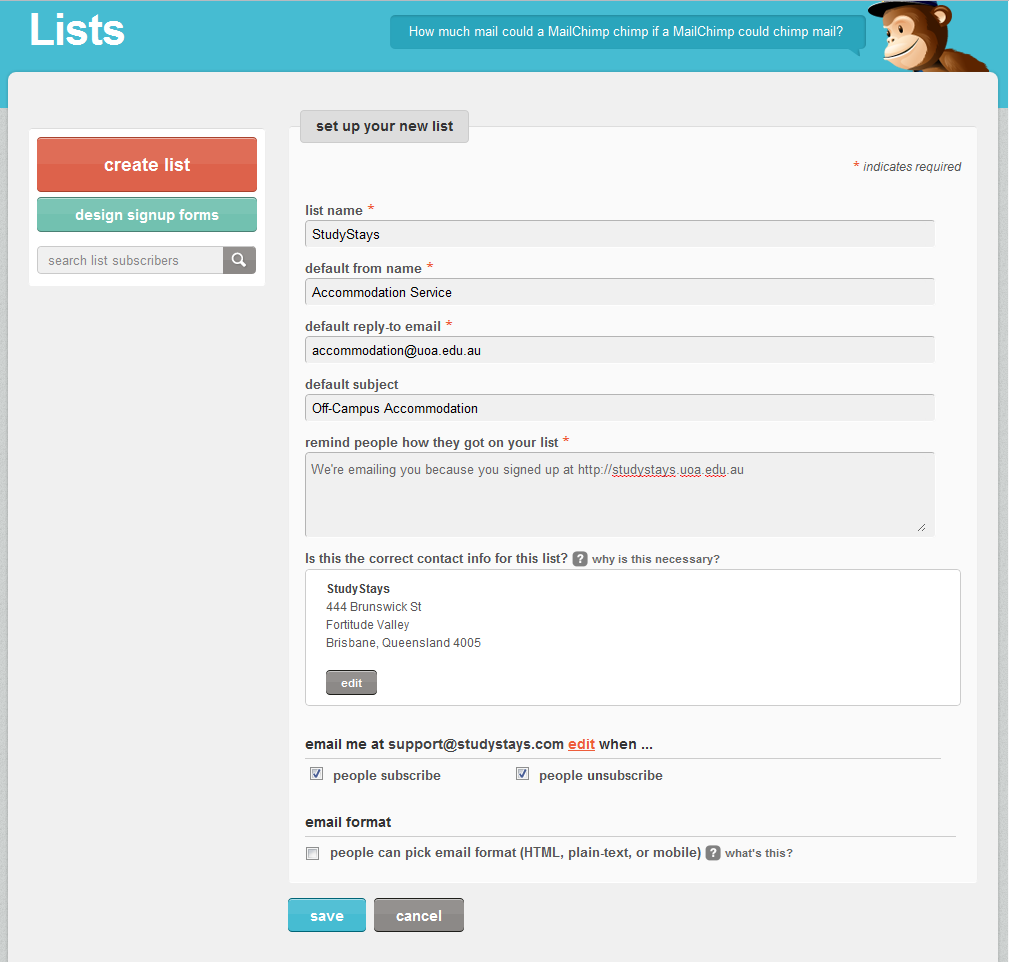
Next you need to create a new list of email recipients. It'll be an empty list to begin with—later on StudyStays will add all your students and providers into the list for you.
- Make sure you're logged into MailChimp, then click Lists, and then click the big create list button. It might ask you if you want to create a group instead: tell it that yes, you're really, really sure you want to create a list!
- Fill out the form to create your list.
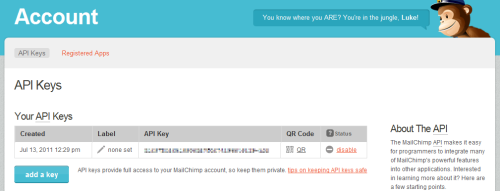
Before StudyStays can synchronise students and providers with your MailChimp account, you need to tell it your MailChimp “API key”. An API key is a sort of password a website can use to access to your MailChimp account. So make sure you don't tell anyone your API key unless you want them to have access to your account.
- Make sure you're logged in to your MailChimp account. Go to the Account menu drop-down (top right) and choose API Keys & Authorized Apps.
- Click add a key
. When the page reloads, you'll see a long string of gibberish under the API Key heading—that's your API key. Copy it to your clipboard with Ctrl-C (Command-C on Mac).
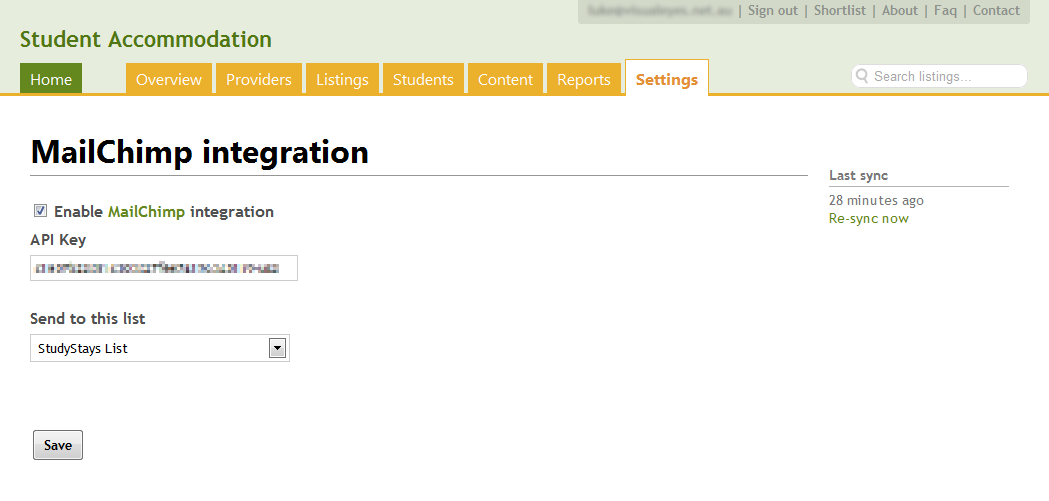
- Log in to your Studystays site, and go to Admin > Settings > MailChimp integration (under Advanced settings).
- Tick the box to Enable MailChimp integration, then enter you API key. You won't be able to select a list yet, so click save.
- When the page reloads, select the list you created in step 2 above. Click save again.
Back on the MailChimp site, click Campaigns (top-right), then create campaign, and choose regular ol' campaign.
You'll want to send to the list you created in step 2 above. You can send to the entire list (all students and providers), or just parts of the list: choosing a “segment” will let you send to just students, just real estate agents, providers who registered in the last month, and all sorts of other combinations.