ID verification is an important tool to help establish the credibility and accountability of accommodation providers and maintain a high level of quality for listings across your StudyStays site.
StudyStays administrators can use supporting documents for accommodation providers (more about that here) to ask providers to upload some form of identification before they are allowed to list their accommodation.
This documentation can be sighted by an administrator, and then removed from your system. The verification process will record what form of ID was sighted, when, and by whom.
You may also choose to record information about the ID before the upload is deleted for future reference, such as licence number, or nationality from a passport. You might like to check with any privacy and security professionals at your university about what information is appropriate to retain, according to your university's privacy standards.
Configuring ID verification for providers
Go to Admin > Settings > Providers and make sure the following boxes are all ticked:
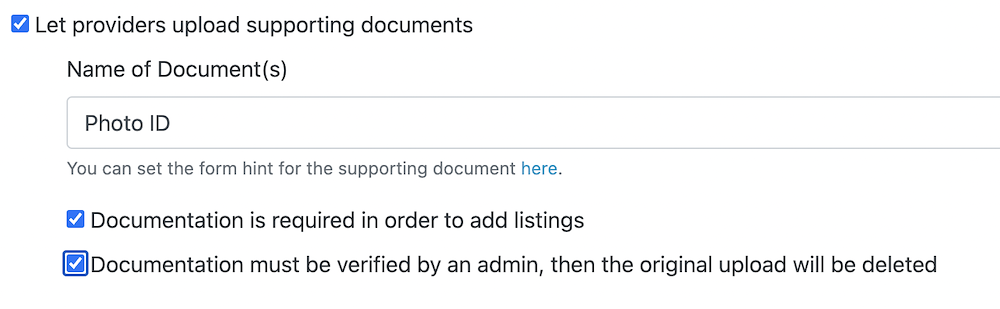
Name of Document(s) is a way for you to describe the forms of identification that you will accept. If you need to add more detailed instructions about what you expect to be uploaded, you can use the form hint for that. Photos in JPEG and PNG format, and PDFs are allowed.
There is also an email template used when you need to request further ID (see Requesting further identification below). You can find this at Admin > Settings > Email templates > Providers > Request ID.
For Providers: Verifying your identity
Accommodation providers may be asked to verify their identity before they can list on a StudyStays site. This involves uploading required documents which will be checked by staff before your listing is approved.
You will only be asked to upload ID once, provided that the ID is accepted by staff.
You will see a screen similar to the following. You can either click "Upload a file" and choose your ID, or drop a file containing your ID into the area provided. Probably the easiest way is to take a photo of your ID on your phone and upload this. PNG, JPEG and PDF files are accepted.
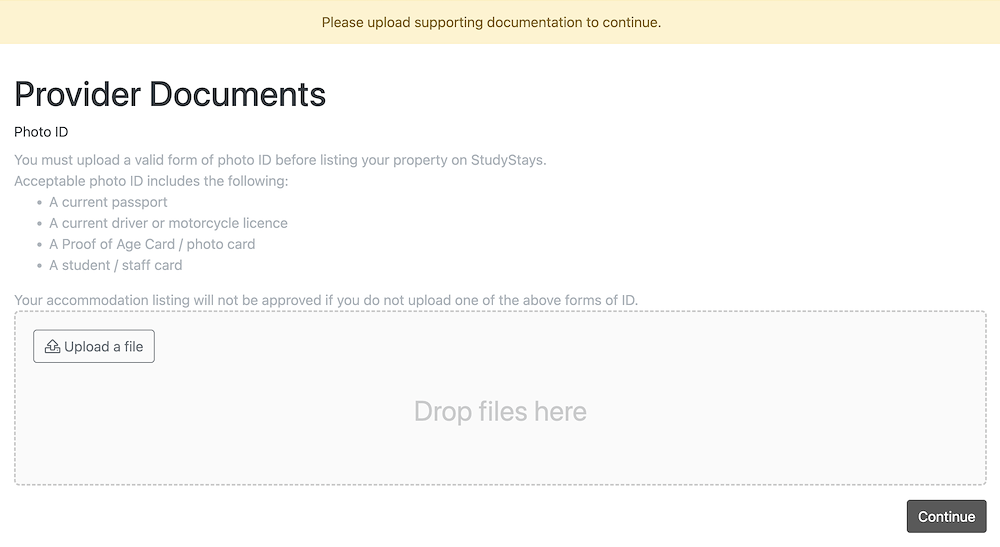
After uploading your ID document you don't need to wait for it to be verified, you can continue straight on to list your accommodation. However, your ID will need to be sighted and approved by staff before your listing can be approved.
If you want to adjust the ID documents that you have uploaded before they have been verified, please see Supporting Documents for Accommodation Providers for more information about how to do that.
For Administrators: Verifying provider ID uploads
When using the settings above (see "Configuring ID verification for providers"), ID verification is built into the listing approval workflow.
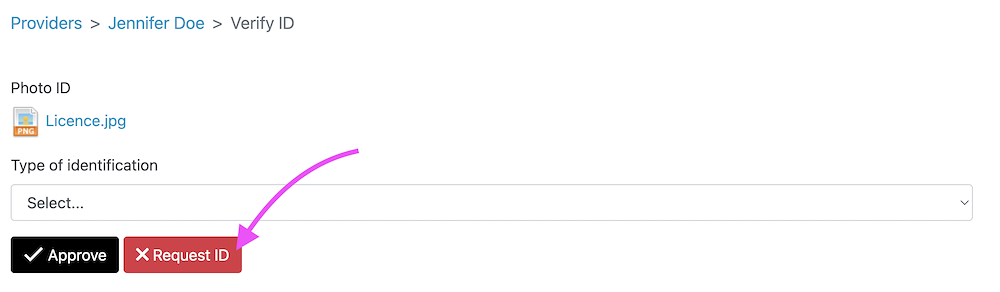
When a provider submits a new listing but their ID hasn't been verified yet, you will be prompted to sight and approve their ID.
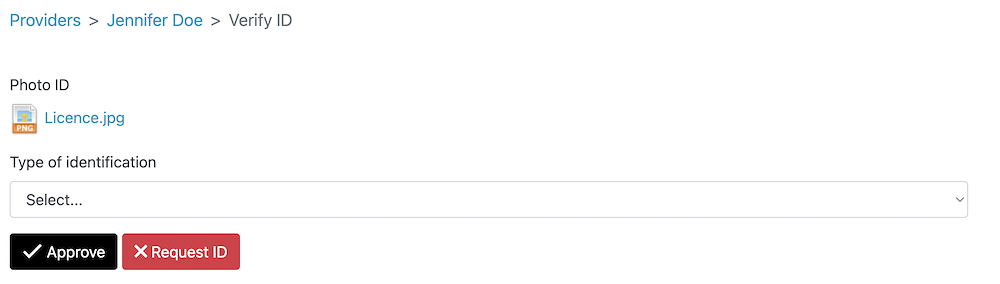
You will see one or more files listed that the provider has uploaded. Click on a file to view it in a new browser tab, and make sure everything checks out.
Next, select the type of identification that you've checked. By default you will see common forms of ID like Passport and Drivers Licence. If you don't see the type of identification you need and you feel like it's missing, please contact StudyStays support to request it. Alternatively, you can use the "Other" type to record various other types of ID that are acceptable.
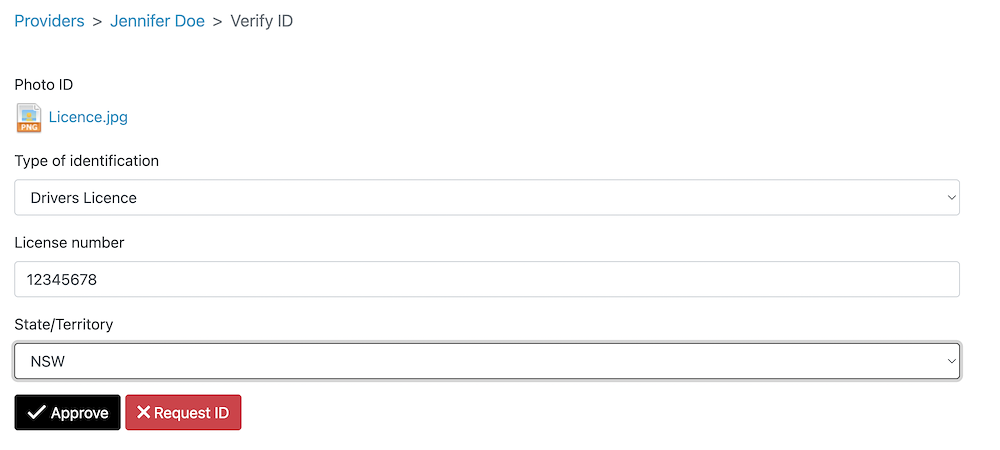
You don't necessarily need to enter additional details about the ID (such as licence/passport numbers and issuing jurisdictions), especially if this would violate your university's privacy policies to retain this personal information. If that's the case, it's enough to record the type of identification and click "Approve" to indicate that you have sighted it.
When you click "Approve", the uploaded documents will be deleted and are no longer recoverable.
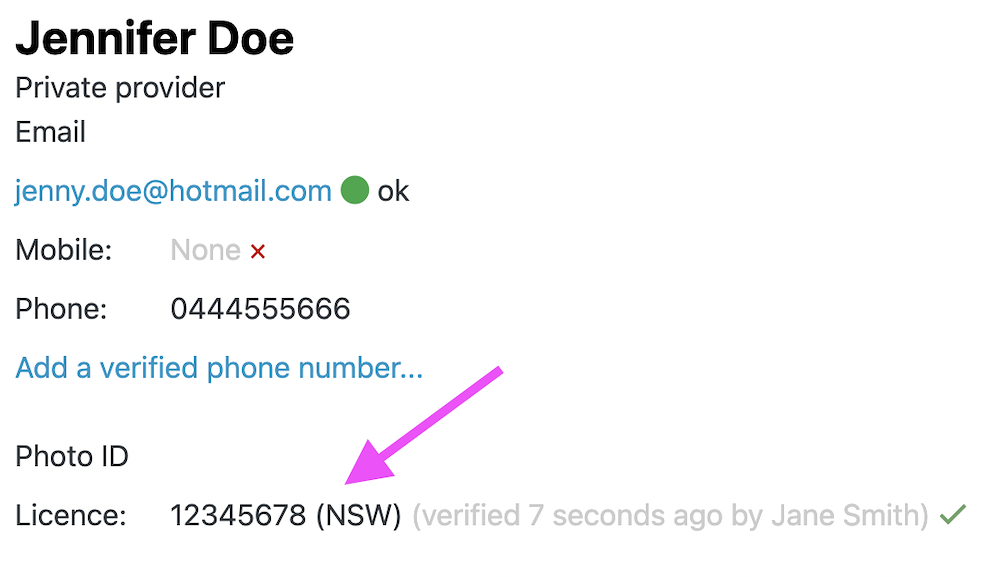
On the provider's details, you will see the ID has been verified (the "Photo ID" title may be different depending on how you have configured this).
You can now continue to approve the new listing submitted by this provider.
As mentioned, once you have verified ID for a provider, they won't need to go through the ID verification process again when they submit subsequent listings.
Requesting further identification
If a provider has not uploaded sufficient ID for some reason, you can request further identification as part of the verification process. Simply click the "Request ID" button.
This will present an email that will be sent to the provider requesting more ID. You can adjust as necessary and click "Send".
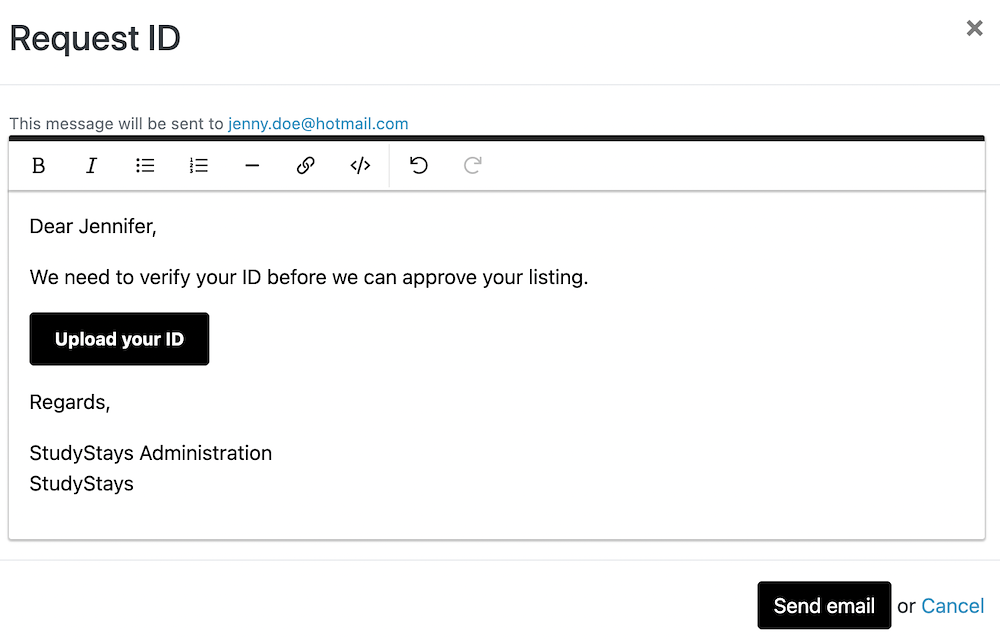
You can adjust the email template for this email from Admin > Settings > Email templates > Providers > ID Required. For example if you want to specify the types of ID that you will accept you can add this to the email template.
Note: SMS verification is also available as an automated way to verify that providers have an Australian mobile number. Please contact StudyStays support for more information.